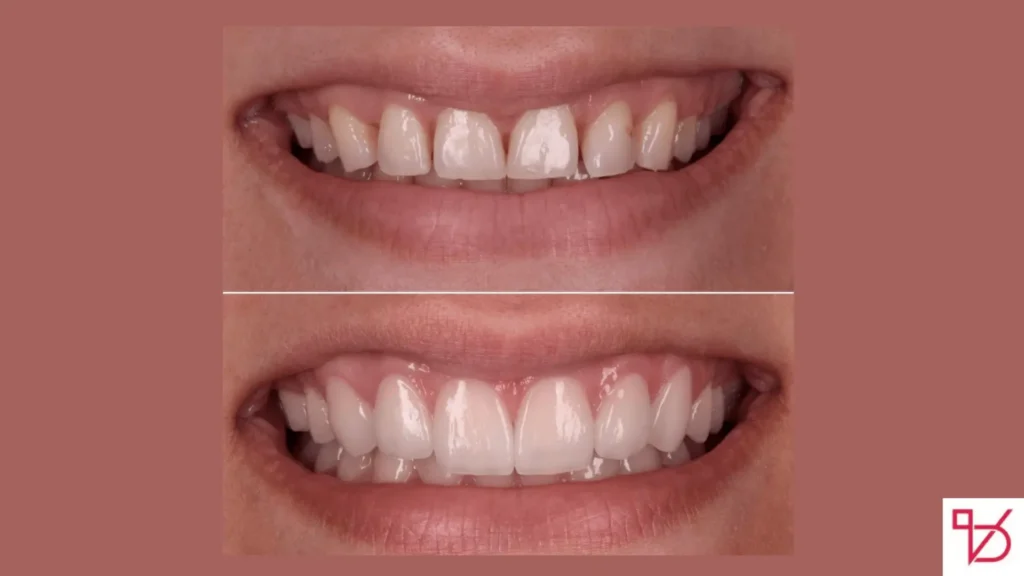
Considering a smile upgrade? If you’ve looked into cosmetic dentistry, you’ve likely come across veneers. Those wafer thin shells that can dramatically transform your appearance. But before the magic happens, your teeth need to be prepped for veneers a crucial step that sets the foundation for a natural looking and long lasting result.
In this guide, we’ll walk you through how front teeth are prepped for veneers, what the process involves, alternatives, risks, and aftercare all from a patient first perspective.
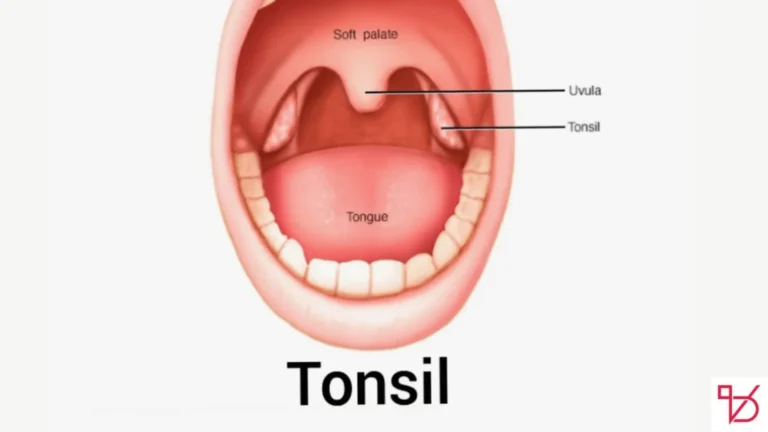
What Are Veneers and Why Is Preparation Necessary?
Veneers are custom made shells of porcelain or composite resin designed to cover the front surface of your teeth. They’re popular for treating:
- Discolored or stained teeth
- Chipped or cracked teeth
- Gaps between teeth
- Slightly misaligned or uneven teeth
- Worn-down enamel
But for veneers to bond effectively and look natural tooth preparation is essential. It ensures the veneer fits seamlessly and doesn’t make your teeth look bulky.
Why Do Teeth Need to Be Prepped for Veneers?
When we talk about prepped teeth for veneers, we’re referring to the removal of a thin layer of enamel from the front of each tooth. This allows space for the veneer to sit properly while preserving as much natural tooth structure as possible.
Common Reasons for Tooth Prep:
- Improved Adhesion: Prepping helps bonding agents work more effectively.
- Better Aesthetics: Prevents a bulky or unnatural appearance.
- Longevity: Enhances veneer durability by providing a stable foundation.
Step by Step Process: How Are Front Teeth Prepped for Veneers?
Here’s what typically happens during the veneer prep process:
1. Consultation & Smile Design
A cosmetic dentist examines your oral health, discusses goals, and evaluates your bite. Advanced practices may use digital smile design to preview results.
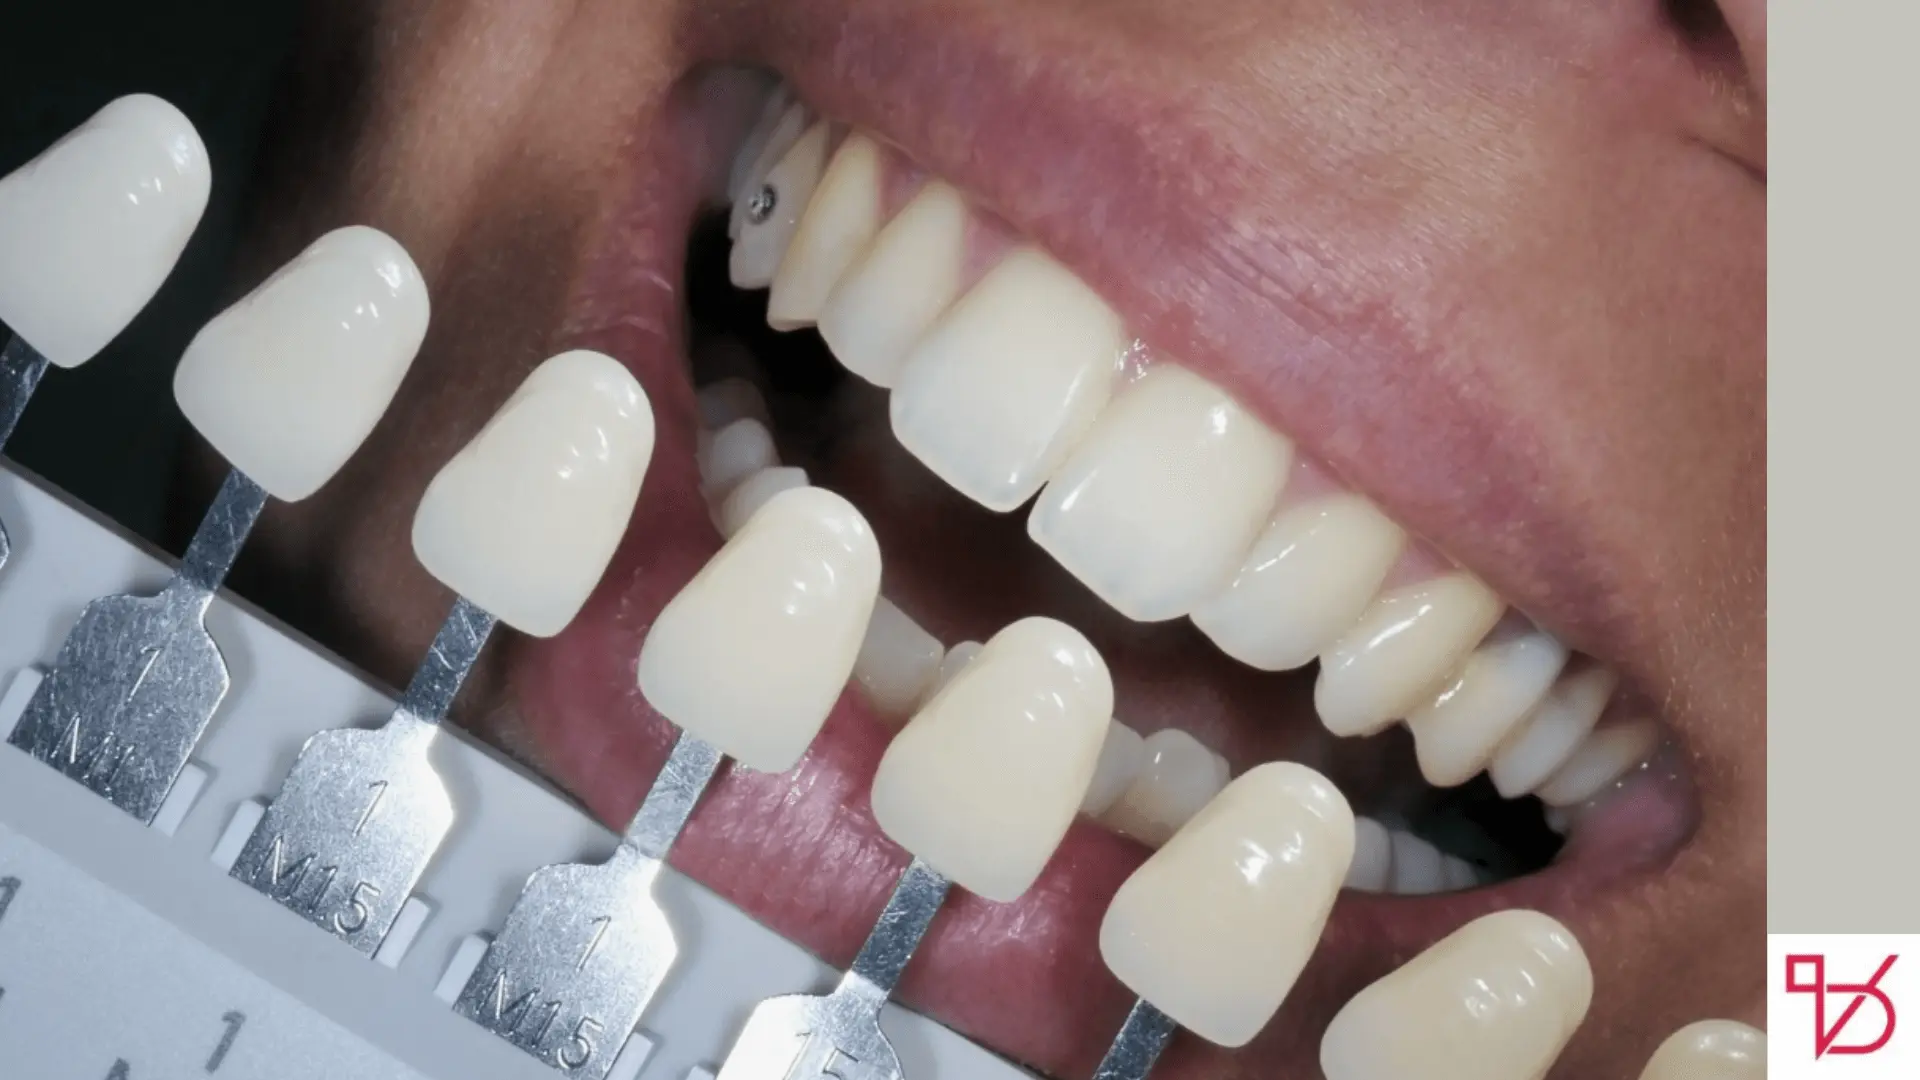
2. Shade Matching
Before prep begins, your dentist helps select the perfect veneer color for your smile. This takes into account your natural tooth shade, skin tone and even facial structure.
3. Enamel Removal
Around 0.3 to 1.5 mm of enamel is removed from each tooth just enough to accommodate the veneer while keeping your tooth structure intact. This part is key to properly prepping front teeth for veneers.
Pro Tip: The amount of enamel removed depends on the type of veneer porcelain often requires more prep than composite or no-prep options like Lumineers.
4. Impressions
After prepping, your dentist takes impressions or digital scans of your teeth. These are sent to a lab where custom veneers are crafted from materials like lithium disilicate, feldspathic porcelain, or zirconia.
5. Temporary Veneers
While waiting for your permanent veneers, you’ll wear temporary veneers. These protect your prepped teeth and give you a sneak peek at your new smile.
Types of Veneers and How They Affect Preparation
| Veneer Type | Material | Prep Required | Durability |
|---|---|---|---|
| Porcelain Veneers | Feldspathic, Disilicate | Moderate to High | 10–30 years |
| Composite Veneers | Resin-based | Minimal | 3–7 years |
| No-Prep Veneers | Ultra-thin Porcelain | Very Minimal | 5–10 years |
Porcelain teeth prepped for veneers require more precision and slightly more enamel removal, but they offer exceptional aesthetics and longevity.
Is Tooth Preparation Painful?
Most people feel little to no discomfort during veneer prep. Local anesthesia is typically used during the enamel removal process. If you’re getting multiple front teeth prepped for veneers, your dentist may break it into sessions.
What Are the Risks of Prepping Teeth for Veneers?
Though safe, there are a few considerations:
- Sensitivity: Exposing dentin may cause mild to moderate tooth sensitivity.
- Irreversibility: Once enamel is removed, it cannot grow back.
- Not suitable for everyone: People with enamel hypoplasia, bruxism, or severe decay may need alternative treatments like crowns.
Alternative Options to Veneers
Before committing to veneers, your dentist may suggest:
- Teeth Whitening – for stains and discoloration
- Dental Bonding – a quick fix for chips and small gaps
- Orthodontics – for alignment and bite correction
- Crowns – for severely damaged or root canal–treated teeth
Aftercare for Prepped Teeth and Veneers
Once your veneers are bonded, care is essential to keep them and your natural teeth in great shape.
Tips:
- Use a soft bristled toothbrush
- Avoid biting hard foods (ice, pens, etc.)
- Consider a nightguard if you grind your teeth
- Keep regular dental checkups
Final Thoughts:
Cosmetic dentistry teeth prepped for veneers is more than a beauty treatment. It’s a blend of science, artistry and precision. Proper preparation ensures that your porcelain or composite veneers look natural, function well and last for years.
Whether you’re getting front teeth prepped for veneers or a full smile makeover knowing the process empowers you to make the right decision.
FAQs
Q: How much enamel is removed for veneers?
Usually 0.3 to 1.5 mm depending on the case and veneer type.
Q: Are veneers reversible?
Traditional porcelain veneers are not reversible due to enamel removal. Some no prep options are partially reversible.
Q: How long do veneers last?
Porcelain veneers typically last 10–30 years while composite lasts 3–7 years.
Q: Can I get veneers if I have sensitive teeth?
Possibly but your dentist will assess the underlying cause first.
Read Also: Why Are My Teeth Yellow When I Brush Them Every Day?